How to Prepare a Los Angeles Home for a Kitchen Project Photo Shoot
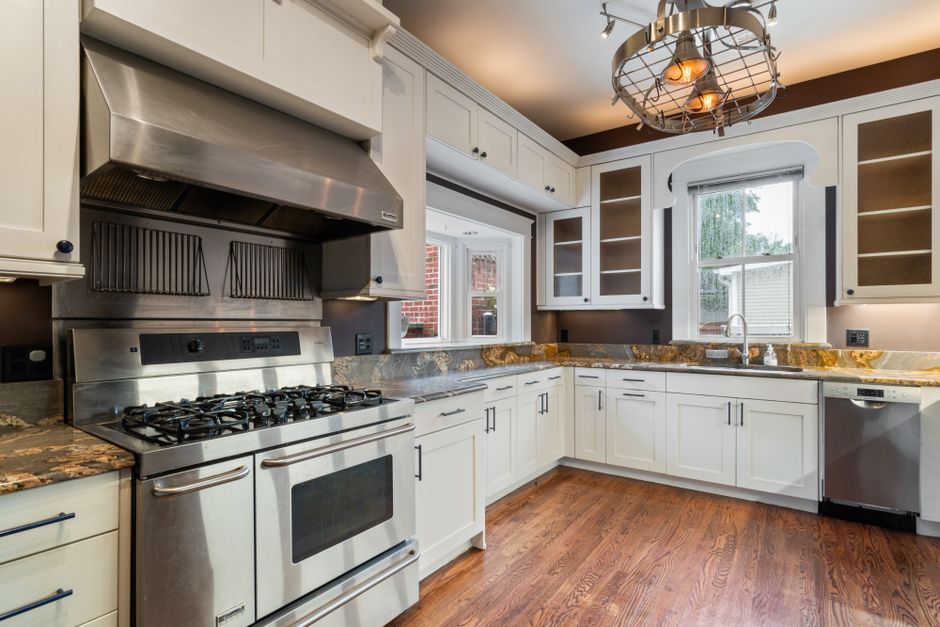
Why does preparation decide the quality of a kitchen photo shoot?
A kitchen photo shoot is a short visit to a room that belongs to somebody else. The remodeler has a window of light, a homeowner who has already lived with contractors for months, and a gallery that will stay online for years. Nearly every disappointing project photo traces back to something that could have been settled before the camera came out: a counter covered in mail, a dish rack beside the sink, a window that looked straight into a neighbor's wall, or a homeowner who was never told the shoot was happening.
In Los Angeles the stakes are a little higher because the housing stock is so varied. A kitchen in a Silver Lake hillside house, a galley in a Pasadena bungalow and a condo kitchen in Santa Monica all behave differently in front of a lens. The preparation steps below apply to all of them, and they are written for the owner or project manager of a remodeling company, not for a professional photographer.
What should be agreed with the homeowner before the shoot?
Ask for permission early, ideally at the final walkthrough, while the homeowner is still pleased with the result. Most people are glad to say yes when the request is specific and polite. Settle these points in plain language and write them down:
- Whether photographs of the finished kitchen may appear on the company website, in a project gallery and on a map listing.
- Whether the home may be shown with its street, house number and neighbors visible, or whether the view through windows should be hidden.
- Whether family members, pets and personal items must stay out of frame.
- Which day and which hours suit the household, with a backup day in case the weather turns.
- Whether the homeowner would like copies of the pictures, which is a small courtesy that often turns into goodwill and a referral.
A short written note or message that records the answers is enough. It protects the business, and it tells the homeowner exactly what will happen so nothing feels like a surprise on the day.
How do you read the room a day ahead?
Visit the kitchen the evening before, or earlier in the week at the same hour as the planned shoot. Stand in each corner, look at where the sun lands and note what is reflected in glossy surfaces. A west facing room in the San Fernando Valley can look flat in the morning and fierce after lunch, while a coastal room near the Westside may glow under the marine layer until late morning. Knowing this lets the shoot start when the room looks best, not when the crew happens to arrive.
Make a short list of problems while walking through: a scuffed baseboard, a cabinet door that sits slightly proud, a loose cover plate, a smudged range hood. Most of these take minutes to fix, and every one of them shows up in a photograph far more than it did in person. A touch up kit with paint, caulk, a marker for wood nicks and a microfiber cloth belongs in the truck.
What gets cleared, and what stays?
The general rule is that a kitchen photographs best when it looks lived in by a tidy person. Clear the counters almost completely, but leave a few chosen items so the room does not feel like a showroom. A bowl of fruit, a cutting board and a single plant are usually enough. Everything else goes into a closed cabinet or a bag in another room.
- Remove magnets, notes, children's drawings and calendars from the refrigerator.
- Take out the dish rack, sponge, soap bottles, trash bins and paper towels beside the sink.
- Clear small appliances unless one is a deliberate part of the scene.
- Straighten stools so they sit at the same distance from the counter edge.
- Fold dish towels neatly or put them away.
- Turn off the television and any visible screens in adjoining rooms.
Cleaning matters more than most people expect. Stainless steel shows every fingerprint, dark stone shows every smear and glossy tile shows every water spot. Wipe each surface with a clean cloth just before the first frame, and keep the cloth within reach during the whole shoot.
How should light and bulbs be handled?
Daylight is the main source in most remodeling photography, and the aim is to let it do the work. Open blinds and curtains fully, then decide whether a sheer is needed to soften direct sun. Turn on under cabinet lights, pendants and recessed lights only after checking that their color matches the daylight reasonably well. A single orange bulb among cool white ones looks like an unfinished job.
Bring a few spare bulbs of the common types. Swapping a mismatched pendant bulb takes seconds, and it removes a color cast that is difficult to fix afterward. If a room feels too dim in a Pasadena or Glendale home with small windows, add a portable light bounced off a white ceiling or wall instead of pointing it at the cabinets, which creates harsh shadows and reflections.
What is the right order of shots on the day?
Work from wide to close. Start with the full room from two opposite corners, then take the main wall straight on, then the island or peninsula, then the sink and range areas. Detail frames come last, because by then the light has usually changed, and close shots forgive more. Check each frame on the screen for crooked verticals, reflections of the tripod and objects left behind on the counters.
- Wide diagonal from the entry corner.
- Wide diagonal from the opposite corner.
- Straight on view of the cabinet wall with the range.
- View of the island or peninsula from the side and from the end.
- Look into the kitchen from the dining or living area.
- Close frames of the countertop edge, backsplash, hardware and lighting.
Take each view twice, once with the lights on and once with them off if the daylight is strong. Later, the better one can be chosen without needing another visit.
How do you deal with permits, inspections and paperwork on the same visit?
Many Los Angeles kitchen projects pass through the Department of Building and Safety, and the final inspection is often the last official event before the shoot. Keep the signed-off paperwork in the project folder, and note the date next to the photos. If the remodel changed gas, electrical or structural elements, a close frame of the finished work, such as the range hood or a panel, may be useful for internal records even if it never reaches the website. The point is to leave one folder that tells the whole story of the job.
What can go wrong, and how is it fixed?
The most common problems are predictable. Rain or smoke haze makes the light flat, so keep a backup date. A homeowner forgets and the household is mid breakfast, so confirm the day before by message. Reflections in the refrigerator and the range hood show the photographer, so shoot from an angle and wear dark clothes. Windows blow out to pure white, so take a second frame exposed for the outside and blend it later. A crew member leaves a tool behind, so do a slow last look at the floor and counters before each frame.
Traffic across Los Angeles County deserves its own line in the plan. A morning shoot in Glendale followed by an afternoon one on the Westside can lose an hour on the freeway, and the afternoon light will not wait. Group shoots by area, and put the room with the most difficult light earliest in the day.
What happens after the shoot?
Copy the files to the project folder that same day, before the memory card is reused. Name them with the project and the shot type, pick the best frame of each view and delete obvious misses. Send the homeowner a few favorites with a short thank you. Then place the hero image and a handful of supporting frames on the project page, and file the rest in the library for later use on service pages and map listings.
A kitchen photo shoot looks effortless when it is done well, and the effort is nearly all in the preparation. A clear agreement with the homeowner, a tidy room, matched bulbs and a fixed order of shots turn a rushed visit into a reliable routine.